If at first you don't succeed... order pizza.

Thursday, April 22, 2010

A disaster-free week! :)

I have been counting down the days until Sunday so I could post about all the yummy dinners we had this week! I am so excited to share the recipes so that other people can enjoy them too :)

On Monday we enjoyed a spin on the classic greek food: the gyro. Traditionally, this sandwich consists of a pita, thinly sliced seasoned lamb rotisserie, tomatoes, onions and a yogurt-based cucumber sauce called tzatziki. They are one of my favorite foods to treat myself to when I am in Rochester because there are two great restaurants that make them!

Making the actual lamb at home, however, is a little overwhelming to me. For one, I am not a fan of lamb prepared in any other way. And two, this lamb is ground, specially seasoned, put on a rotisserie and constantly shaved with a special tool as the outside cooks--making it crusty and brown on one side and nice and juicy on the other.

I saw Ina Garten make a marinated lamb kabob on Food Network and the marinade looked really yummy so I thought I would try it with chicken and make our own little chicken gyros instead. The only thing I did different from the recipe is to add a few cloves of chopped garlic.

I also couldn't find the really yummy, soft pitas so I used some Naan instead that I found at Trader Joes and it actually worked quite well. Just stick it on the grill with the kebabs for the last few minutes to toast up and warm each side!


I also made the tzatziki sauce from scratch for this meal and it was surprisingly simple! I have always wanted to try making it because I douse my gyros with it typically and it is so fresh and refreshing tasting! (I had tons leftover and I have been dipping my carrots and celery in it- fabulous!!) The base for the sauce is Greek yogurt which is basically plain yogurt that has been drained so it is really thick. You can find it at most stores but if, for some reason, you can't find it, just take plain yogurt, place it is a strainer lined with cheese cloth and let it sit in the fridge over night. All the liquid will drain out and you will be ready to go!

Tzatziki Sauce:
16 oz. Plain Greek yogurt
1/2 english cucumber, shredded with all liquid squeezed out
2 Tbl. olive oil
1 Tbl. red wine vinegar
3 cloves garlic pasted (chop garlic, sprinkle with salt, use the flat part of your knife to grind the garlic against the cutting board making a paste)
1/2 tsp salt
Mix all ingredients in a non-reactive bowl (not metal) and chill for a few hours.
Serve with gyro, vegetables, warmed or toasted pita


Oh yeah, for a side we had my favorite Greek salad :)

On Tuesday, Alex came home from work early and we had a nice picnic outside! I had planned on him having practice this night, so I made my mom's chicken curry salad the day before so he could have dinner on his way to practice. Well, he ended up not having practice and I had dinner already prepared! :)

My mom has made this salad for a long time and it is always a summer staple. It is simple to prepare and so, so delicious. Filled with juicy chicken meat, sliced green grapes, raisins, celery and walnuts, this salad is dressed with a small amount of mayo, lemon juice and curry powder and eaten on yummy croissants. I also tried eating it on a wrap and it was equally delicious!


Curry Chicken Salad
4 chicken breasts cooked, chopped into small pieces
2 C green grapes, sliced
1/4 C chopped Walnuts
3 stalks celery chopped finely
3/4 C raisins
Sauce: mix together.
1/2 C mayo
2 Tb. lemon juice
1 1/2 tsp curry powder
dash pepper

On Wednesday, we grilled :) We had simple steaks rubbed with our favorite Weber Grind and Grill Chicago Steak seasoning, grilled and then topped with a small piece of Black Truffle Butter. This butter can be a little expensive and I just had some left over from a different recipe. It is not necessary but adds a really luxurious taste to the steak :) For sides we had simple sauteed mushrooms seasoned with a little garlic salt and onion powder, asparagus on the grill and sliced red potatoes seasoned with rosemary, wrapped in tin foil and cooked on the grill.


I really love being able to grill in the summer because you can take a bunch of simple things that are easy to prepare and put them together making a really delicious seemingly non-simple dinner :) Pay attention later on for a quick idea for using up these leftover simple sides!

If you like french bread and you would like to know how to make it, pay close attention now... I have found the best recipe. I have made homemade french bread before and used a few different recipes and I won't look for new recipes anymore. This recipe makes two french baguettes and they are soft and chewy and sweet and salty and, well, amazing.
Looks amazing, right? ;) Let me tell you, this bread makes your home smell so warm and inviting. I am going to be making it every chance I get. (And what makes it even better is it costs less than a dollar to make!) Eat it plain with butter, slice it thinly and make it into crostini for dips or bruschetta, or use it to make your favorite sub sandwiches!

I did make a few changes to the recipe because some of the steps didn't really fit. My breadmaker's dough function mixes the dough, kneads the dough and than lets the dough rise. In the recipe, there is a step that directs you to place the dough in a bowl and let it rise before punching it down and rolling it out. I just skipped this step and went straight to punching it down and rolling it out.

I also used an entire egg for the egg wash instead of just an egg yolk (as the recipe calls for) and, after I applied the egg wash, I sprinkled the tops of the loaves with some regular old table salt. I think this salt adds like three levels of deliciousness to the finished product! I am not sure why but it really reminds me of bread that you would get at a pizzeria or something. It actually reminds me of the breadsticks I used to order at Sabarro in high school :)


Ok, enough about the bread. Although I could have eaten this bread alone and been happy, we did actually eat it with a meal :) I made a creamy tomato pasta that was quick and easy and incredibly delicious.

To start, I sauteed some pancetta (italian bacon- you could sub bacon if you like) in a small amount of olive oil with a large clove of chopped garlic. After the pancetta had started to crisp I added a few chopped mushrooms. Saute for a few minutes, add your favorite jar of spaghetti sauce and simmer for 5-10 minutes on low heat. Meanwhile, cook any cut of pasta (we used bow ties) until al dente.

After the sauce has simmered and the pasta has cooked, melt in half a container of marscapone cheese and stir until smooth. Mix sauce and pasta and serve with freshly grated parmesan cheese.


The marscapone cheese adds a completely creamy mouth-feel to the sauce but doesn't make it taste any cheesier. It just makes the sauce feel like velvet and taste completely rich. The pancetta and mushrooms add enough meatiness that you don't miss having any ground beef or anything in the actual spaghetti sauce.

Finally! A quick recipe we had for breakfast on Saturday that used up some of our simple grilled sides from earlier in the week. Usually I try to plan enough for dinner so that Alex can take leftovers for lunch the next day. However, he decided to eat all the steak and dinnertime, leaving me with a bunch of leftover potatoes, mushrooms and asparagus.

Perfect ingredients to make a fritatta!!


A fritatta could be compared to either an omelet or a quiche. The only difference between these two things is you don't have to make several omelets and spend your whole morning flipping them at the stove and there is no crust.

To make this fritatta, I simply heated a tablespoon of butter in a medium non-stick frying pan and sauteed my leftover veggies until they were heated through. If you are starting from scratch, just saute any combination of vegetable (or even meats!) long enough to cook them. Meanwhile, beat 6 eggs with a tablespoon of cream (or milk) and a small amount of salt, pepper and hot sauce (if you like it). Once the veggies are warm, add the egg mixture.

With the pan or medium, medium-high heat, let the egg mixture cook on the bottom without stirring it. When you can see the eggs firming up on the sides, use a rubber spatula and lightly push away the eggs from the sides, letting the raw egg mixture run into the sides to cook.

Heat your broiler to low with the rack at the top of the oven. When the egg mixture looks almost completely done except for the middle, place the pan in the oven under the broiler. (I leave the oven door slightly open with the handle sticking out so that it is sure not to melt!)

Watch the fritatta closely becauce cooking times vary. When the egg mixture is firm, sprinkle the top with the cheese of your choice and return it to the oven to melt. Slice into wedges and serve :)


Wow, this was a long post... let me know if you try any of the recipes!! :)

Bonus Recipe: Caramel Espresso Bar!!


I saw Giada make these bars a few weeks ago on Food Network and I automatically purchased all the ingredients needed during my next trip to the store. And that should tell you something about how good they looked-- the ingredients weren't even listed on my shopping list (which I try to stick to pretty close) and they ended up in my shopping cart all the same :)

So the ingredients have been staring at me every time I open my pantry door, begging me to use them. And finally, after two weeks, I found an excuse to make these delicious bars! I mean, I shouldn't always need an excuse to make myself a treat, right? And, I'll admit, there are several occasions where I end up just making treats for myself. However, I have found that if I have somewhere to take the treat, I can still try it, freeze a few and then ship the rest off to other people's hips ;)

These treats were made special for my fabulous MOPs group. It was our last week this week until we start up again in September (with all new groups :( ) and I love to make treats for these ladies! The original recipe states that it will serve 6-8 people. 6-8 people?? I ended up cutting them much smaller then the recipe suggested because they turned out so incredibly rich that you could only eat a small amount in one sitting. So I froze two rows, packed up about 40 to go to my MOPs meeting and sent about 20 in to work with Alex.


All in all, the recipe was pretty simple but it took a little bit of time to complete. There were three basic steps: make a graham cracker crust, make homemade caramel, and then melt some chocolate chips with a little heavy cream.

I have never made homemade caramel before but I am going to make it again really soon! All you need to make caramel is cream, brown sugar, butter, a saucepan and a candy thermometer. You stir all the ingredients together until the mixture is smooth and then let it boil until the temperature reaches 240 degrees. The end product is a luxuriously smooth and creamy caramel that is so silky and delicious! I think next time I will just poor it right onto a piece of parchment paper and cut it into squares. Or maybe I will just eat it right out of the pan with a spoon ;)

Some suggestions I have if you feel like giving this recipe a try:
1) Some of the reviewers of the recipe said the 1 1/2 sticks of butter called for in the crust was way, way too much butter. One reviewer suggested that 6 Tbl. was plenty so that is what I tried. My crust ended up being slightly more crumbly then I would have liked it so next time I would increase the amount to probably 1 stick or 8 Tbl.
- another reviewer suggested making the crust out of shortbread (genius! a homemade twix bar!! this will definitely be on my treat list soon!)
2) The chocolate layer on top is quite rich. I even used 1/2 cup milk chocolate chips and 1 1/2 cups semi-sweet chips because I ran out of semi-sweet chips but I think that I would do less than 2 cups total chocolate chips next time and do half milk, half semi-sweet.
3) I also didn't do the sea salt on top of the chocolate because I didn't have it. If you have it, try it and let me know what you think! I am sure it brings the overall taste to a whole new level :)
4) And finally, I am a sucker for peanut butter and chocolate in any form so I might try to find a way to sneak some peanut butter in here too! Mix in with the crust maybe or in with the chocolate layer-- yum... yum... ;)

Sunday, April 18, 2010

Spring is here! :)

We are happily and greedily welcoming Spring in this household (happily because the winter is just a little too long with a little one itching to run outside and greedily because when the sun is shining, we are sure to be soaking it up!). And with the entrance of spring, this family also welcomes the entrance of baseball... which means practices, games to play, games to go to and games to watch on tv-- all of which affect the planning of my weekly menu :) Ok, so games to watch on tv have nothing to do with planning a menu but there are plenty on so I had to throw them into the mix.

Alex is playing on a baseball team this summer that he has played with in years past and practices three nights a week, which makes my menu planning a bit trickier. But not anything I can't handle! ;) I have been trying to plan things he can take with him in the morning to eat after work on his way to practice, but sometimes even with the best of planning, Wendy's ends up being the best option!

But enough about baseball... on to the menu! I think I am going to try a new way of posting and see how it works. My plan is to post on Sundays. In each post I will describe in more detail the meals and menu plan from the previous week. This way I can add recipes, any changes I would make and some yummy photos to make you all very hungry and wanting to rush off to the store to grab ingredients right away! :)

Then, at the end of each post, I will just list the menu for the next week without details, descriptions or pictures. If something tickles your taste buds, then check back the next Sunday and everything you'll need will be there waiting for you!

We really only had three real meals that I prepared last week. (Again, I am still getting this whole baseball practice thing figured out and I had girl's night on Friday so you better believe my kitchen was closed!)

I have told a few people about these fabulous pork chops in the last month or so, making me very hungry for them! They are called Parmesan Crusted Pork Chops and they are AMAZING. And simple!- which makes them even better :)


I think what makes these pork chops so good is that you actually press the shredded parmesan cheese directly on the pork chop instead of mixing it in with the breadcrumbs (which is what I normally see when something is parmesan crusted). So instead of getting an end product that is crusted and tastes slightly like cheese, you end up with a moist, tender piece of pork that has a nice crust on the outside and a beautiful layer or salty, tangy, parmesan goodness on the inside. Delicious.

I have found that if you are preparing the pork chops for more than three people, you will need to cook them in batches. Just place the already cooked pork chops in your oven as low as it will go on cooling racks on a baking sheet. Even if you don't need to put them in the oven, I would still recommend placing them on cooling racks before placing them on plates. Placing them on the cooling racks first will prevent the breading from steaming after it is already crunchy, which eventually causes the breading to just fall off-- no good.

Serve with a sprinkling of lemon juice on the top and whatever veggie you want (and of course bread, my husband is a sucker for a good loaf of chewy bread and butter) and you've got yourself a meal that anyone would go crazy for.

One of our favorite spring-time veggies is asparagus and we love to grill it. But when we aren't grilling and still want asparagus, I've found that you can prepare it the exact same way under the broiler-- Drizzle with olive oil, sprinkle with your favorite seasoning (I like Weber's Grind-and-grill Chicago steak seasoning but just plain salt and pepper work as well), and broil on low for 5-10 minutes, depending on how crisp you like your veggies.


One of the meals I had planned to have on a night Alex had practice is one of my favorite summer go to meals. Well I think I have a lot of favorite summer go to meals but this is pretty close to the top of the list. I found philly cheesesteak meat at walmart in the meat section. It is thinly sliced, frozen steak that is practically fool-proof to prepare.

Simply heat a frying plan over medium high heat, add a bit of oil and place the little disks right on in. They almost look like hamburger patties when they are frozen but you will soon find, as the meat begins to thaw and get brown and crispy in the pan, that these patties are made up of paper thin (thinner than paper) pieces of steak that have been rolled into tight little rolls. Four patties come in a package and it only costs $5!! Once the first side is brown, you simply flip them, add any seasonings you wish (I like the Chicago seasoning, once again), break up the meat, cook until no longer pink and -voila-.

I also like to add some sauteed onions and peppers to the mix. Slice, saute, the end. Then you just take your favorite roll (french bread works great). Heat your oven to 350, slice the bread, layer in your meat, veg and some shredded mozzerella cheese. Wrap in tin foil and place in the oven until the cheese is all gooey and melty.

I really wish I would've thought to take a picture of this one but it was late when we sat down to eat and after getting one look at that cheesy, melty, juicy steak sandwich, the only thing on my mind was to eat it. However, have no fear, next time there will be a picture posted... and since just writing about it has made me want to eat one right now, it shouldn't be too long :)

The last thing we had this week, well besides fish sticks and tator tots, tuna melts or chinese food, was something I promised a picture from last week: tilapia! I prepared it the exact same (salt and pepper the tilapia filets, dredge in flour, saute in a little oil or cooking spray over med-high heat for a few minutes per side) and served it with my favorite summer salad (mixed greens, fruit and candied pecans).

I also tried to make a new recipe this week and I think it is safe to classify it as a semi-disaster. Maybe I should make a disaster scale... from a one to ten (one being a tiny disaster), I guess I would say it was a class two disaster-- and it didn't have anything to do with the recipe.

They were called Fried Smashed Potatoes with Lemons and when I saw Giada make them on Food Network I thought they looked really delicious! Basically, you boil red potatoes until they are done, then drain them, let them dry for about 5 minutes, smash them with the palm of your hand so they are little disks and then fry them in a pan. The finished product is supposed to be a delightfully crispy potato cake that is soft in the center and drizzled with a homemade lemon-parsley vinaigrette. Ours ended up as hashbrowns for breakfast this morning-- and these actually were quite good :)

So either my potatoes were too big or I really don't like lemon as much as she does (and she likes lemon A LOT) but they ended up soaking up all the garlic flavored olive oil and burning in the pan before falling apart


But enough about last week, I am already looking forward to next week!! :)
Monday: Chicken gyros with greek salad and homemade tzatziki sauce.
Tuesday (baseball night): Curry Chicken salad croissants
Wednesday: Grilled steaks with black truffle butter, rosemary potatoes, asparagus, sauteed mushrooms.
Thursday (baseball night): Curry Chicken salad wraps
Friday: Creamy Marscapone and Tomato pasta with homemade bread.

Enjoy the sunshine!! We are getting our pool out next week! :)

Thursday, April 8, 2010

Croissants for Easter and A Salad-filled Menu to Recover


My mother is a fabulous cook. Whenever I spend a few days in Rochester, I just plan on gaining weight- there is no getting around it. She is always planning our favorite meals for when we are visiting and Easter was no different... the best glazed spiral ham I am ever eaten, my mother's famous cheesey potatoes (recipe seen in previous post), the most delicious fruit filled spinach salad, and broiled asparagus. But this year I felt like I should pitch in a bit. So I thought, hey, why not make homemade croissants?? ( I know, ambitious right?) And let me tell you, these babies were taaaassttyyyy. But we will reserve them for special occasions only... and maybe every 5 years or so...

It took me three days from start to finish-- including making the original dough and a butter block from three sticks of butter (!), then layering this butter block with the dough and folding, chilling, rolling, folding, chilling, rolling, folding, chilling, rolling, folding, chilling, rolling, cutting, rolling, proofing and (whoo!!!!) baking.

If you kept track of all those foldings, rollings and chillings that makes a total of about 160 tiny layers of butter and dough which equals a very flaky, tender, delicious product.


On top of the delicious Easter lunch we all enjoyed we also participated in one of my personal favorite family traditions on Saturday night... its called "Junk Food Night" and it is pretty much the best.

What's Junk Food Night? You poor, poor people.

Junk Food Night is when we prepare our most favorite foods that are usually only eaten on said night-- (including but not limited to) bacon-wrapped water chestnuts with a sweet brown sugar ketchup sauce, nachos, guacamole, "Dad's favorite dip" (cream cheese, salsa, lemon juice), shrimp cocktail, egg rolls, jalapeno poppers... oh yeah and some carrots.

We fill our plates and then go sit in front of the t.v. on an old blanket and watch movies until the food is gone and we are about asleep. This is definitely a family tradition that will live on in my house :)

HOWEVER, returning to our own house, I was really hungry for salads... And since this is a rare occurrence I thought I should take advantage of it. So here was our menu for the week!

Monday: Tilapia and chopped salad.
I think I am going to have to start making this tilapia once a week. For one, it takes all of five minutes, start to finish. For two, tilapia is really quite economical. I bought a bag of 7 frozen fillets at Walmart for $6. And for three... its delicious! Lately I have been craving the fresh caught walleye we used to eat at my Grandpa's cabin during our summer visits as kids and this tasted so close it was amazing.
All I did to prepare it was sprinkle the fillets with salt and pepper, coat them lightly in flour and cook in a large non-stick frying pan over medium high heat with a small amount of olive oil for about two minutes a side. Then just squeeze a little lemon juice on top and devour. I didn't get a picture this time, but I'll post one next week when we eat it again ;)
As for the salad it was a simple mixed green, avocado, yellow pepper and cucumber salad with some Good Seasonings Italian Dressing- yum.

Tuesday, Alex was supposed to have baseball practice and I was supposed to have egg salad (Hello, Easter.) Well, it rained, practice was canceled and we met his mom at Chipotle :)

Wednesday I used some leftover ham from Easter and made my mom's quiche. Simple, delicious and pairs perfectly with my new favorite salad for the summer: Mixed greens, strawberries, mango, homemade candied pecans and light raspberry walnut vinaigrette.


Quiche
Bake pie crust in 450 degree oven for 10 minutes in an ungreased glass pie dish.
(You'll want to make sure and prick the crust all over with a fork or it will blow up like a balloon!)
Cook in 3 Tbl. butter:
- 1/2 lb. sliced button mushrooms
- 1 c. diced ham
- 1/2 c. sliced green onions
- 1/2 tsp. salt
- 1 tsp. lemon juice
Cook until moisture is gone (about twenty minutes on medium, medium-high heat)
Pour into crust.
Beat:
- 4 eggs
- 1 cup cream
- 1/2 tsp. salt
- 1/2 tsp. pepper
Pour into shell, top with 1 cup shredded swiss cheese.
Bake at 350 degrees for 40 minutes (watch at the end for excessive browning and cover with tin foil if necessary)

Candied Pecans
Place 1/2 cup sugar into small non-stick frying pan.
Heat over med-high heat until sugar melts (you will want to watch this closely so it doesn't burn-- once it starts to melt you can swirl the pan to make sure it melts evenly)
Take off heat and add 1 cup pecan pieces.
Mix until pecans are coated and then pour onto wax/parchment paper.
Separate.

Thursday: Alex had baseball practice tonight as well- which was not on the schedule when I made my menu. We were supposed to have the Greek Salad that I have posted on before and some chicken cooked on the George Foreman.
However, since Alex was getting dinner somewhere else before practice I decided to try something new. I made the greek salad into a pasta salad and added chunks of grilled chicken directly to the salad... o.m.g. this is delicious. I had to use regular egg noodles because that was all I had but any small noodle would work. So I cut up all the veggies, added the noodles that I had drained and rinsed with cold water, added the feta and the dressing and then added the cooled chicken.


Definitely a great twist on a traditional pasta salad!

Tomorrow we are having BBQ Chicken pizza (I made extra chicken tonight purposely for an easy meal tomorrow.) All that goes into this simple dinner is making the dough in my breadmaker (dump ingredients, press start), par-baking, spreading with bbq sauce,and adding the chicken and thinly sliced red onion and cheese. Then... bake.

Saturday we are grilling with neighbors and Sunday is my day off ;)

I hope that these summery salads find their way onto your menu sometime while the weather is warm and if you happen to have three days that you would love to see filled up- I will gladly share my croissant recipe :)

Tuesday, March 30, 2010

What's Cookin'?


So this was one of those weeks where it is really hard to plan a menu. Alex is still busy with projects at work this week and has no idea which nights he will be working late and when he will be eating dinner at home. I also only needed to plan for three dinners since it is Easter weekend and we are at my parent's house all weekend and Alex and I are both busy around dinnertime on Thursday. Then to make it even easier on myself, I planned to make something big on Monday and have leftovers on Wednesday (more on this later- I ended up making something too big and we will be freezing most of it!).

I actually made up a recipe for stuffed shells this week! I mean, you can't really go wrong when making stuffed shells-- you take shells, cheese, sauce and whatever else you want. But I actually had to figure out amounts of ingredients and cooking times! It was so cool to not read a recipe and to actually have to write down what I was doing so that I could publish my own recipe later! I call them Hearty Stuffed Shells and they were delicious! They are a great dish to make ahead of time, to freeze or to send to a friends house.

And here it is friends! Seen for the first time! haha

Hearty Stuffed Shells by Christina Garee!

Makes about 40 shells (12 servings or 2 9x13 in pans)

Ingredients:
1 egg, beaten
15 oz ricotta
1/2 parmesan cheese (I prefer freshly grated)
4 cups shredded mozzerella, divided
1/2 tsp pepper
1/2 tsp salt
1 small onion, chopped
3 cloves garlic, chopped
1 10 oz pkg. frozen spinach, thawed, well drained
1 lb ground beef (93/7)
1 lb italian sausage- mild, sweet or spicy
1 6 oz can tomato paste
1 15 oz can tomato sauce
1 28 oz can crushed tomatoes
1 box jumbo shells

Directions:
Combine egg, ricotta, parm, 2 cups mozzerella, spinach and salt and pepper. Mix well.
Saute onion and garlic over medium high heat in a little extra virgin olive oil until translucent. Add hamburger and sausage, breaking up with a spoon.
Cook over med-high heat until cooked through.
Drain grease from pan.
Remove 1/3 meat mixture to cool slightly.
Add tomato paste, sauce and crushed tomatoes to remaining meat mixture and simmer for 10 minutes on low.
Meanwhile cook shells in large pot of boiling water and 1 tbl evoo. Cook for about 7 minutes. Drain. Allow to cool slightly in colander and then spread onto cookie sheet sprayed with cooking spray.
Add reserved meat mixture to cheese mixture. Mix well.
Using a small ice cream scoop, fill shells with cheese mixture.
Grease two 9x13 inch pans with cooking spray.
Spoon about 2 cups of the tomato sauce onto the bottom of each pan.
Lay filled shells on top of sauce, spreading equally between the two pans. (Or however many you decide is right for your family, I divided among three actual baking dishes- one for monday, one for wednesday and one to freeze)
Cover shells with remaining sauce.
- at this point you can refrigerate until you are ready to use it or freeze it for a later date (you will want to add the cheese right before baking and increase baking time to 1 hour if frozen at 45 minutes if refrigerated)
Sprinkle each pan with 1 cup mozzerella (or more-up to you!) and some more parmesan cheese
Bake at 350 for 30-40 minutes until cheese is melted and browning and sauce is bubbling.

Serve with roasted garlic garlic bread and a salad.

Roasted Garlic Garlic Bread
Cut the top off of one whole head of garlic.
Place in a small ramekin and drizzle with olive oil.
Cover with aluminum foil and roast at 350 for 1 hour.
Allow to cool slightly, then squeeze out soft garlic cloves and mix with one stick of room temperature butter.
Refrigerate if not using right away.
Cut loaf of french bread in half length-wise.
Spread with garlic butter, sprinkle with mozzerella (optional)
Bake at 350 until bread is toasted to your preference.
Cut into 3 inch pieces.


Well that takes care of two+ meals for this week (and probably two more for another week!)

As for tonight, my older sister Melissa and her boyfriend Frank came up for dinner and we enjoyed Giada DeLaurentiis' Tilapia Fish Tacos!

I had seen Giada make this recipe last week and it looked so yummy and fresh! Then this week, I looked in my fridge and had pretty much everything I needed to make them! I LOVE WHEN THIS HAPPENS!! All I needed to buy was a mango and some tilapia (which was on sale at Walmart this week! Double Bonus!)

These are not your typical fish tacos. You actually take wonton wrappers, brush them with a little bit of oil and bake them in muffin tins to form little cups. You then make a fresh salad of chopped mango, chopped avocado, chopped green onion, arugula and a simple lime vinaigrette. I subbed fresh spinach for the arugula and added some very finely chopped fresh jalepeno. You top with pan sauteed tilapia and they are perfect for dinner with a salad (which is what we had tonight) or as an appetizer at a party! They were very delicious and very fresh. Perfect for our entry into Spring and Summer :)


One last thing I tried this week was a special snack for my husband. As a baseball player he loves to be eating seeds or corn nuts or something related to the two. So, since corn nuts aren't cheap and are veeerrrryyy addictive- I thought I'd try to make my own.

Ok so I didn't make them entirely from scratch. I took some very nice help from the store (Fleet Farm) and added my own flavorings. Just call me Sandra Lee ;)

At Fleet Farm, you can purchase plain corn nuts in a 12 oz bag for $1.25 which is the same exact price as a 6 oz bag of already flavored, brand-name corn nuts.

So I bought four bags...

In this recipe I used two of them and one packet of ranch dressing mix. All I did was empty two bags into a glass bowl, sprinkle the mix over the top and toss until all the corn nuts were coated. Then I drizzled a very, very, very tiny amount of oil over the top and tossed to coat again. Bake at 170 (or as low as your oven will get if it doesn't go that low) for 5 minutes. Cool and enjoy! In fact, I am pretty sure I hear him crunching away on some now ;)

Sunday, March 28, 2010

Homemade Sushi for Beginners!

Hey everybody! The meals last week needed to be moved around a little bit since Alex ended up working so many late nights (which is ok to do as long as you are flexible and figure out which meals work for when and what ingredients will last the longest!) so we ended up having gyoza and sushi for dinner tonight :)

The gyoza were delicious! I added shrimp to the recipe that I posted for last week but I think when I make them next time, I would add more shrimp and take out the mushrooms... it will make for a much smoother, softer filling which is more appealing to me:) I added a picture to the menu post, so if you are curious to see how they turn out you can find it there!

As for the sushi, this is not my first time making sushi but I would say (after some burned rice) it was my most successful--and tasted quite a bit like the sushi you pay much more money for!

Now when I say I made sushi, I mean I either made California, Spicy California, American Dream, or any kind of veggie roll. I do not eat raw fish, so my kind of sushi is very safe--yet very, very, very delicious. And easy!

What you will need are:
- Sushi rice (I found my last bag at Walmart, and after trying to cook it the traditional way--the rice is still stuck to the bottom of my favorite pot-- I learned that this bag is so much simpler! No rinsing, soaking, draining, medium cooking, high cooking, low cooking, steaming, and steaming with a towel... just boil, simmer, sit.)
- Nori wraps (Toasted, dried seaweed papers)
- Seasoning for the rice (1 Tbl rice wine vinegar, 1 tsp sugar, 1/2 tsp salt)
- Fillings: Avocado, Cucumber, Crab for a California roll-- we'll stick with these for today.
- Bamboo sushi mat and paddle- I found mine at the outlet near by house at a cooking shop

Seven Simple Steps to Scrumptious Sushi
1. Prepare Sushi rice according to package directions. While the rice is cooking, prepare your filling ingredients. Cut everything small enough to roll into a small sushi roll... smaller is better.

2. "Season" sushi rice with the rice wine vinegar mixture from above and mix to cool. It looks really cool when you watch actual Sushi Masters make and season their sushi rice. They make it in huge, wooden bowls and splash the vinegar mixture all over the rice with their bamboo paddle as they shift and fold and flip the rice all over.

3. Lay your bamboo sushi mat on the counter with the slats going horizontal to your body. Place a nori wrap on the mat--shiny side up. Wet your fingers and spread the sticky rice on the front half of the sheet. You only need about a 1/4 inch thickness--any more than this and it will squish out the ends when you roll the sushi.

4. Next you will want to place a few pieces of each ingredient at the end of the rice closest to you. If you are making a California roll, you will want one small slice of ripe avocado, a few matchstick pieces of cucumber and a small amount of crab. (Avocado and Cucumber rolls are also fantastic!)

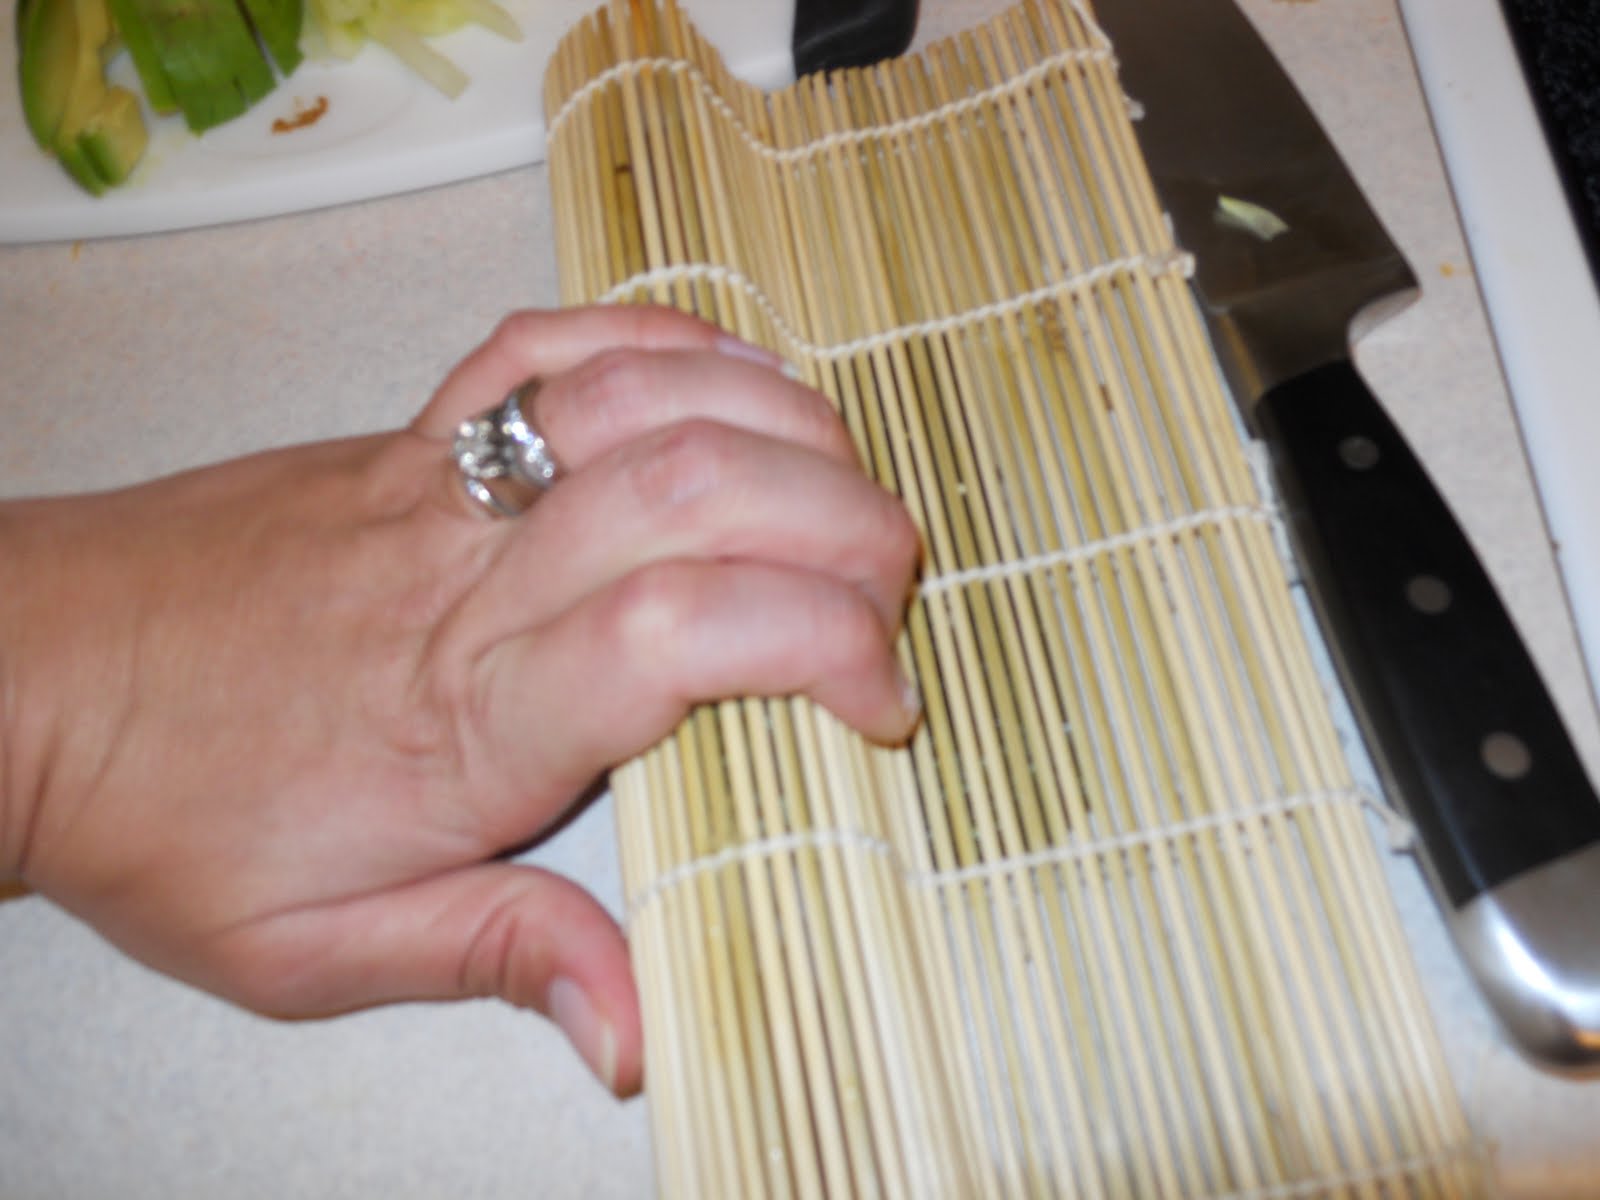
5. Pick of the end of the bamboo mat closest to you and, very carefully--keeping all the filling tight to the rice with your finger tips-- fold into a roll. Firmly squeeze the bamboo mat to secure the roll together.

6. Remove roll from mat and cut away any excess nori wrap. With a very sharp knife, cut the roll into equal pieces about an inch wide-- clean the knife in between each cut. It is also most effective to do just one sawing motion from front to back to front as you gently push the knife through the roll.

7. Last step is to arrange the rolls onto your plate or platter in an attractive way! If you have ever been to a sushi restaurant, you have an idea of the works of art those sushi masters send to your table. You can be as creative as you want. :)

Serve with wasabi and reduced-sodium soy sauce.

And don't be surprised if your kitchen ends up looking like a bomb went off. Like I said in my first post, I do not believe that actual cooking looks at beautiful and graceful as they make it look on t.v. Your children are pulling ingredients of the counters. You are tripping over bears or frogs or dog chews. The rice had burned and the pan is soaking in the sink while you try and attempt another batch. Every usable inch of counter space has been used and you just start stacking things on top of each other.


What is most important is that you have fun. And that, the majority of the time, what comes out of the kitchen is delicious and satisfying and brings joy to you and your family.

Saturday, March 27, 2010

Bonus Recipe: Cake Balls!!!

I have been wanting to post this since Wednesday! However, my computer is old and doesn't allow me to access my blog and Alex had a very rough week at work at didn't get home with his computer until 1:30am on Wednesday making it quite difficult to share :(

I have often thought these little gems should have a more appealing name. I mean, they really are amazing. They are versatile, relatively simple to make, EVERYBODY loves them, and yet, the mention of a "cake ball" just doesn't cause my mouth to water like it should.

Maybe we should call them cake truffles? Seems more fitting, we'll try it.

So what is a cake truffle? Besides being absolutely delicious you mean? Well it is basically like a ball of cake! (Hey! Maybe that is where the name came from!) It is everything you love about cake, in a convenient, bite size, mess-free little ball.

Here, we'll start at the beginning.
To make a cake truffle, you need three simple ingredients: A baked and cooled cake (of any flavor- more on this later), an entire container of frosting (whichever flavor compliments your cake) and a brick of almond bark (either white chocolate, regular chocolate or both--again depending on which cake and frosting you choose!) You can also bake the cake a day ahead of time...
You will also need various microwave safe bowls, a spatula, a few cooling racks, a baking sheet, and a small sized ice cream scoop, and of course the ingredients needed to make the cake from the box. :)

Sounds simple enough right? It really is!

The next step is to crumble the cake with your hands into a large bowl. (This can be a fun step for kids to help with!) Then take the top of the frosting (and the silver seal!) and microwave for thirty seconds. Add the warmed frosting into the crumbled cake and mix well.
You will now want to stick this mixture in the fridge for an hour or so... it will make the balling and covering more enjoyable :) And don't be turned off by the glop of mess that you see in the bowl after this step! Trust me, these babies are gold!

Now for the fun part! Take your cooled cake and frosting mixture and a small-sized ice cream scoop (I use this when I am making cookies or balling melon as well if you were unsure what I was referring to). Set two cooling racks onto your sheet pan and then just start balling! After releasing the balls onto the cooling racks, I usually press the tops and sides to make sure they are firmly packed. I normally get about 52 balls from an entire cake--but that depends on how much of the mixture you sneak in the process. You'll want to make sure they are set about a centimeter or so apart.

Once all the balls are formed. Melt the entire package of almond bark according to the directions on the package. Be very careful not to burn it and also not to get any water in it. Both things will negatively alter the outcome.

Then simply spoon the chocolate over the balls making sure you cover every surface except the bottom--we will cover that part later. You will have to play around with different techniques and find which works best for you.

If you are using a frosting the comes with sprinkles or you would like to add your own toppings (coconut, pecans, almonds, sprinkles, etc.) you will need to add them when the almond bark is still wet. I find it works best to cover one row then apply a topping. If you wait too long, the almond bark with harden and no topping will stick.

Once all the balls are covered and the almond bark as hardened, remove the balls from the drying racks and place them on a piece of wax paper--bottoms up :)

At this point, you have a choice. In order to cover the rest of the balls, you will need to scrape the hardened almond bark, that dripped off the cake balls while covered, back into your microwave-safe bowl and remelt it in order to cover the bottoms. The other option is to use more than one brick of almond bark and just melt fresh--the choice is yours. The taste will not be altered either way but the coating may be a bit more smooth if you melt fresh chocolate. I chose to scrape the almond bark and use as much of it as I could this time, but may choose the other option next time.

Then just dip the bottoms and let them harden the same way. Sneak a taste and then either package them for friends or keep them all for yourself!! :)

These cake balls are funfetti flavored and I added a few drops of red food coloring to the cake batter to add a festive Spring look :)

Like I said, these treats are so yummy and so versatile! The combinations of cake and frosting flavors are endless, not the mention various toppings and two different flavors of almond bark. I have also tried: german chocolate cake with coconut pecan frosting and either white or chocolate almond bark topped with coconut and drizzled with the opposite flavor of almond bark. I have even used up leftover cupcakes that were getting dried out and made a mini batch of cake balls!


Need some more inspiration? Here are a few of many possibilities!
• White cake mix and mint chocolate chip icing
• French vanilla cake with white chocolate almond icing
• Red velvet with cream cheese icing
• Chocolate cake with milk chocolate icing
• Lemon cake with lemon frosting
• Lemon cake mixed in white chocolate chips and lemon frosting
• Spice cake with cream cheese frosting
• Cherry chip cake mix and cream cheese frosting
• Fudge cake, mixed in peppermint chips and fudge frosting
• Chocolate fudge cake mix and coconut pecan frosting
• Chocolate cake, butter cream icing
• Strawberry with vanilla frosting
• Carrot cake with cream cheese frosting

Have you ever tried making cake balls before? If not I hope you will... and if you have, write me and tell me what your favorite flavor combination is!

I think next up on my list are banana cake balls. I wonder if it works as well with homemade cake? I have a fabulous recipe for banana cake and cream cheese frosting and a whole bunch of bananas that are getting mighty ripe... looks like I found something to do next week! :)