If at first you don't succeed... order pizza.

Tuesday, March 30, 2010

What's Cookin'?


So this was one of those weeks where it is really hard to plan a menu. Alex is still busy with projects at work this week and has no idea which nights he will be working late and when he will be eating dinner at home. I also only needed to plan for three dinners since it is Easter weekend and we are at my parent's house all weekend and Alex and I are both busy around dinnertime on Thursday. Then to make it even easier on myself, I planned to make something big on Monday and have leftovers on Wednesday (more on this later- I ended up making something too big and we will be freezing most of it!).

I actually made up a recipe for stuffed shells this week! I mean, you can't really go wrong when making stuffed shells-- you take shells, cheese, sauce and whatever else you want. But I actually had to figure out amounts of ingredients and cooking times! It was so cool to not read a recipe and to actually have to write down what I was doing so that I could publish my own recipe later! I call them Hearty Stuffed Shells and they were delicious! They are a great dish to make ahead of time, to freeze or to send to a friends house.

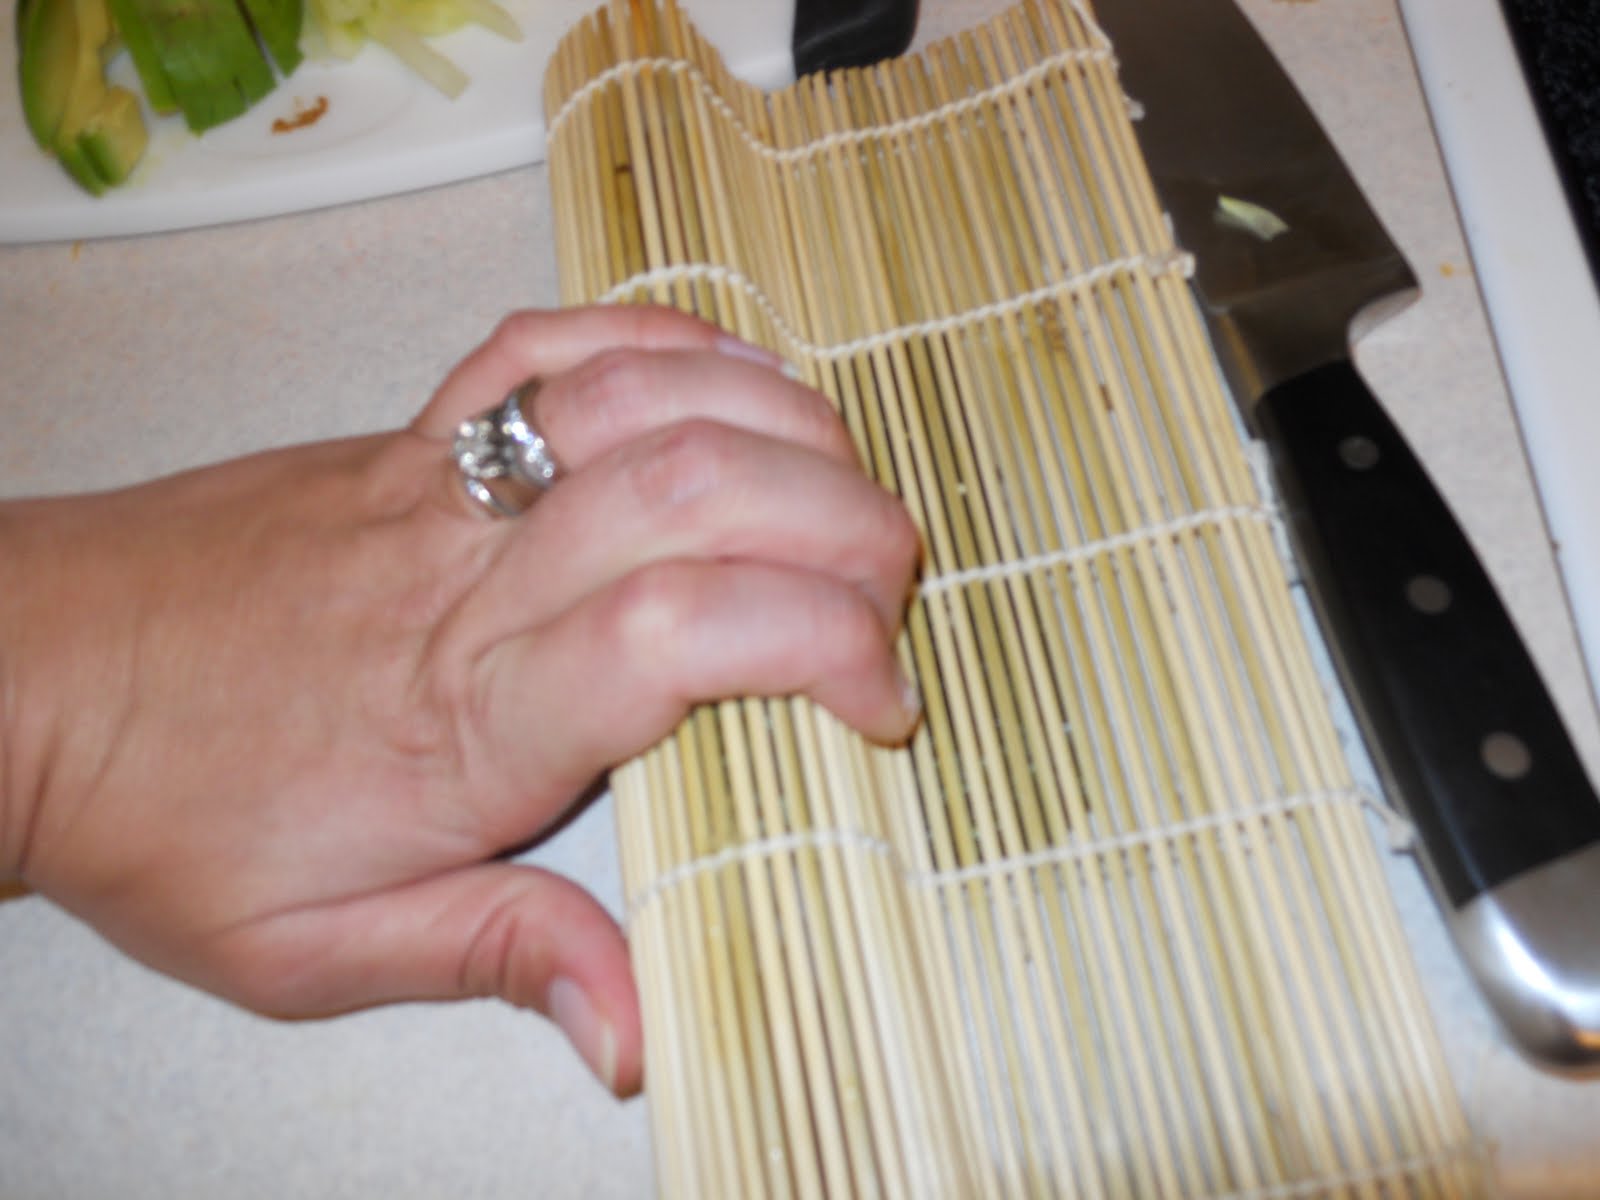
And here it is friends! Seen for the first time! haha

Hearty Stuffed Shells by Christina Garee!

Makes about 40 shells (12 servings or 2 9x13 in pans)

Ingredients:
1 egg, beaten
15 oz ricotta
1/2 parmesan cheese (I prefer freshly grated)
4 cups shredded mozzerella, divided
1/2 tsp pepper
1/2 tsp salt
1 small onion, chopped
3 cloves garlic, chopped
1 10 oz pkg. frozen spinach, thawed, well drained
1 lb ground beef (93/7)
1 lb italian sausage- mild, sweet or spicy
1 6 oz can tomato paste
1 15 oz can tomato sauce
1 28 oz can crushed tomatoes
1 box jumbo shells

Directions:
Combine egg, ricotta, parm, 2 cups mozzerella, spinach and salt and pepper. Mix well.
Saute onion and garlic over medium high heat in a little extra virgin olive oil until translucent. Add hamburger and sausage, breaking up with a spoon.
Cook over med-high heat until cooked through.
Drain grease from pan.
Remove 1/3 meat mixture to cool slightly.
Add tomato paste, sauce and crushed tomatoes to remaining meat mixture and simmer for 10 minutes on low.
Meanwhile cook shells in large pot of boiling water and 1 tbl evoo. Cook for about 7 minutes. Drain. Allow to cool slightly in colander and then spread onto cookie sheet sprayed with cooking spray.
Add reserved meat mixture to cheese mixture. Mix well.
Using a small ice cream scoop, fill shells with cheese mixture.
Grease two 9x13 inch pans with cooking spray.
Spoon about 2 cups of the tomato sauce onto the bottom of each pan.
Lay filled shells on top of sauce, spreading equally between the two pans. (Or however many you decide is right for your family, I divided among three actual baking dishes- one for monday, one for wednesday and one to freeze)
Cover shells with remaining sauce.
- at this point you can refrigerate until you are ready to use it or freeze it for a later date (you will want to add the cheese right before baking and increase baking time to 1 hour if frozen at 45 minutes if refrigerated)
Sprinkle each pan with 1 cup mozzerella (or more-up to you!) and some more parmesan cheese
Bake at 350 for 30-40 minutes until cheese is melted and browning and sauce is bubbling.

Serve with roasted garlic garlic bread and a salad.

Roasted Garlic Garlic Bread
Cut the top off of one whole head of garlic.
Place in a small ramekin and drizzle with olive oil.
Cover with aluminum foil and roast at 350 for 1 hour.
Allow to cool slightly, then squeeze out soft garlic cloves and mix with one stick of room temperature butter.
Refrigerate if not using right away.
Cut loaf of french bread in half length-wise.
Spread with garlic butter, sprinkle with mozzerella (optional)
Bake at 350 until bread is toasted to your preference.
Cut into 3 inch pieces.


Well that takes care of two+ meals for this week (and probably two more for another week!)

As for tonight, my older sister Melissa and her boyfriend Frank came up for dinner and we enjoyed Giada DeLaurentiis' Tilapia Fish Tacos!

I had seen Giada make this recipe last week and it looked so yummy and fresh! Then this week, I looked in my fridge and had pretty much everything I needed to make them! I LOVE WHEN THIS HAPPENS!! All I needed to buy was a mango and some tilapia (which was on sale at Walmart this week! Double Bonus!)

These are not your typical fish tacos. You actually take wonton wrappers, brush them with a little bit of oil and bake them in muffin tins to form little cups. You then make a fresh salad of chopped mango, chopped avocado, chopped green onion, arugula and a simple lime vinaigrette. I subbed fresh spinach for the arugula and added some very finely chopped fresh jalepeno. You top with pan sauteed tilapia and they are perfect for dinner with a salad (which is what we had tonight) or as an appetizer at a party! They were very delicious and very fresh. Perfect for our entry into Spring and Summer :)


One last thing I tried this week was a special snack for my husband. As a baseball player he loves to be eating seeds or corn nuts or something related to the two. So, since corn nuts aren't cheap and are veeerrrryyy addictive- I thought I'd try to make my own.

Ok so I didn't make them entirely from scratch. I took some very nice help from the store (Fleet Farm) and added my own flavorings. Just call me Sandra Lee ;)

At Fleet Farm, you can purchase plain corn nuts in a 12 oz bag for $1.25 which is the same exact price as a 6 oz bag of already flavored, brand-name corn nuts.

So I bought four bags...

In this recipe I used two of them and one packet of ranch dressing mix. All I did was empty two bags into a glass bowl, sprinkle the mix over the top and toss until all the corn nuts were coated. Then I drizzled a very, very, very tiny amount of oil over the top and tossed to coat again. Bake at 170 (or as low as your oven will get if it doesn't go that low) for 5 minutes. Cool and enjoy! In fact, I am pretty sure I hear him crunching away on some now ;)

Sunday, March 28, 2010

Homemade Sushi for Beginners!

Hey everybody! The meals last week needed to be moved around a little bit since Alex ended up working so many late nights (which is ok to do as long as you are flexible and figure out which meals work for when and what ingredients will last the longest!) so we ended up having gyoza and sushi for dinner tonight :)

The gyoza were delicious! I added shrimp to the recipe that I posted for last week but I think when I make them next time, I would add more shrimp and take out the mushrooms... it will make for a much smoother, softer filling which is more appealing to me:) I added a picture to the menu post, so if you are curious to see how they turn out you can find it there!

As for the sushi, this is not my first time making sushi but I would say (after some burned rice) it was my most successful--and tasted quite a bit like the sushi you pay much more money for!

Now when I say I made sushi, I mean I either made California, Spicy California, American Dream, or any kind of veggie roll. I do not eat raw fish, so my kind of sushi is very safe--yet very, very, very delicious. And easy!

What you will need are:
- Sushi rice (I found my last bag at Walmart, and after trying to cook it the traditional way--the rice is still stuck to the bottom of my favorite pot-- I learned that this bag is so much simpler! No rinsing, soaking, draining, medium cooking, high cooking, low cooking, steaming, and steaming with a towel... just boil, simmer, sit.)
- Nori wraps (Toasted, dried seaweed papers)
- Seasoning for the rice (1 Tbl rice wine vinegar, 1 tsp sugar, 1/2 tsp salt)
- Fillings: Avocado, Cucumber, Crab for a California roll-- we'll stick with these for today.
- Bamboo sushi mat and paddle- I found mine at the outlet near by house at a cooking shop

Seven Simple Steps to Scrumptious Sushi
1. Prepare Sushi rice according to package directions. While the rice is cooking, prepare your filling ingredients. Cut everything small enough to roll into a small sushi roll... smaller is better.

2. "Season" sushi rice with the rice wine vinegar mixture from above and mix to cool. It looks really cool when you watch actual Sushi Masters make and season their sushi rice. They make it in huge, wooden bowls and splash the vinegar mixture all over the rice with their bamboo paddle as they shift and fold and flip the rice all over.

3. Lay your bamboo sushi mat on the counter with the slats going horizontal to your body. Place a nori wrap on the mat--shiny side up. Wet your fingers and spread the sticky rice on the front half of the sheet. You only need about a 1/4 inch thickness--any more than this and it will squish out the ends when you roll the sushi.

4. Next you will want to place a few pieces of each ingredient at the end of the rice closest to you. If you are making a California roll, you will want one small slice of ripe avocado, a few matchstick pieces of cucumber and a small amount of crab. (Avocado and Cucumber rolls are also fantastic!)

5. Pick of the end of the bamboo mat closest to you and, very carefully--keeping all the filling tight to the rice with your finger tips-- fold into a roll. Firmly squeeze the bamboo mat to secure the roll together.

6. Remove roll from mat and cut away any excess nori wrap. With a very sharp knife, cut the roll into equal pieces about an inch wide-- clean the knife in between each cut. It is also most effective to do just one sawing motion from front to back to front as you gently push the knife through the roll.

7. Last step is to arrange the rolls onto your plate or platter in an attractive way! If you have ever been to a sushi restaurant, you have an idea of the works of art those sushi masters send to your table. You can be as creative as you want. :)

Serve with wasabi and reduced-sodium soy sauce.

And don't be surprised if your kitchen ends up looking like a bomb went off. Like I said in my first post, I do not believe that actual cooking looks at beautiful and graceful as they make it look on t.v. Your children are pulling ingredients of the counters. You are tripping over bears or frogs or dog chews. The rice had burned and the pan is soaking in the sink while you try and attempt another batch. Every usable inch of counter space has been used and you just start stacking things on top of each other.


What is most important is that you have fun. And that, the majority of the time, what comes out of the kitchen is delicious and satisfying and brings joy to you and your family.

Saturday, March 27, 2010

Bonus Recipe: Cake Balls!!!

I have been wanting to post this since Wednesday! However, my computer is old and doesn't allow me to access my blog and Alex had a very rough week at work at didn't get home with his computer until 1:30am on Wednesday making it quite difficult to share :(

I have often thought these little gems should have a more appealing name. I mean, they really are amazing. They are versatile, relatively simple to make, EVERYBODY loves them, and yet, the mention of a "cake ball" just doesn't cause my mouth to water like it should.

Maybe we should call them cake truffles? Seems more fitting, we'll try it.

So what is a cake truffle? Besides being absolutely delicious you mean? Well it is basically like a ball of cake! (Hey! Maybe that is where the name came from!) It is everything you love about cake, in a convenient, bite size, mess-free little ball.

Here, we'll start at the beginning.
To make a cake truffle, you need three simple ingredients: A baked and cooled cake (of any flavor- more on this later), an entire container of frosting (whichever flavor compliments your cake) and a brick of almond bark (either white chocolate, regular chocolate or both--again depending on which cake and frosting you choose!) You can also bake the cake a day ahead of time...
You will also need various microwave safe bowls, a spatula, a few cooling racks, a baking sheet, and a small sized ice cream scoop, and of course the ingredients needed to make the cake from the box. :)

Sounds simple enough right? It really is!

The next step is to crumble the cake with your hands into a large bowl. (This can be a fun step for kids to help with!) Then take the top of the frosting (and the silver seal!) and microwave for thirty seconds. Add the warmed frosting into the crumbled cake and mix well.
You will now want to stick this mixture in the fridge for an hour or so... it will make the balling and covering more enjoyable :) And don't be turned off by the glop of mess that you see in the bowl after this step! Trust me, these babies are gold!

Now for the fun part! Take your cooled cake and frosting mixture and a small-sized ice cream scoop (I use this when I am making cookies or balling melon as well if you were unsure what I was referring to). Set two cooling racks onto your sheet pan and then just start balling! After releasing the balls onto the cooling racks, I usually press the tops and sides to make sure they are firmly packed. I normally get about 52 balls from an entire cake--but that depends on how much of the mixture you sneak in the process. You'll want to make sure they are set about a centimeter or so apart.

Once all the balls are formed. Melt the entire package of almond bark according to the directions on the package. Be very careful not to burn it and also not to get any water in it. Both things will negatively alter the outcome.

Then simply spoon the chocolate over the balls making sure you cover every surface except the bottom--we will cover that part later. You will have to play around with different techniques and find which works best for you.

If you are using a frosting the comes with sprinkles or you would like to add your own toppings (coconut, pecans, almonds, sprinkles, etc.) you will need to add them when the almond bark is still wet. I find it works best to cover one row then apply a topping. If you wait too long, the almond bark with harden and no topping will stick.

Once all the balls are covered and the almond bark as hardened, remove the balls from the drying racks and place them on a piece of wax paper--bottoms up :)

At this point, you have a choice. In order to cover the rest of the balls, you will need to scrape the hardened almond bark, that dripped off the cake balls while covered, back into your microwave-safe bowl and remelt it in order to cover the bottoms. The other option is to use more than one brick of almond bark and just melt fresh--the choice is yours. The taste will not be altered either way but the coating may be a bit more smooth if you melt fresh chocolate. I chose to scrape the almond bark and use as much of it as I could this time, but may choose the other option next time.

Then just dip the bottoms and let them harden the same way. Sneak a taste and then either package them for friends or keep them all for yourself!! :)

These cake balls are funfetti flavored and I added a few drops of red food coloring to the cake batter to add a festive Spring look :)

Like I said, these treats are so yummy and so versatile! The combinations of cake and frosting flavors are endless, not the mention various toppings and two different flavors of almond bark. I have also tried: german chocolate cake with coconut pecan frosting and either white or chocolate almond bark topped with coconut and drizzled with the opposite flavor of almond bark. I have even used up leftover cupcakes that were getting dried out and made a mini batch of cake balls!


Need some more inspiration? Here are a few of many possibilities!
• White cake mix and mint chocolate chip icing
• French vanilla cake with white chocolate almond icing
• Red velvet with cream cheese icing
• Chocolate cake with milk chocolate icing
• Lemon cake with lemon frosting
• Lemon cake mixed in white chocolate chips and lemon frosting
• Spice cake with cream cheese frosting
• Cherry chip cake mix and cream cheese frosting
• Fudge cake, mixed in peppermint chips and fudge frosting
• Chocolate fudge cake mix and coconut pecan frosting
• Chocolate cake, butter cream icing
• Strawberry with vanilla frosting
• Carrot cake with cream cheese frosting

Have you ever tried making cake balls before? If not I hope you will... and if you have, write me and tell me what your favorite flavor combination is!

I think next up on my list are banana cake balls. I wonder if it works as well with homemade cake? I have a fabulous recipe for banana cake and cream cheese frosting and a whole bunch of bananas that are getting mighty ripe... looks like I found something to do next week! :)

Sunday, March 21, 2010

Menu: March 22-March 28

I have been waiting all weekend to be able to make my menu! I am really obsessed if you can't already tell ;) And I am glad I waited... some good items in the sales today plus some great coupons I found for items I already had on my list! (Another tip, if you don't get the Sunday paper--I get the Sunday paper purely for the ads, don't tell my journalism professor!-- you can also find coupons for widely used ingredients to print at coupons.com)

This weeks menu is made up of a mix of family favorite standards and some new dishes (which makes the chance for an entertaining--for you-- disaster a bit higher!)

Monday: Beer boiled brats on the grill; Baked beans; carrots; chips
-- I may even make myself a Mojito! I reignited my love for these tasty little concoctions on my recent trip to Mexico. Super simple to make, a slice of lime, a sprig or two of mint, some ice, some run, some club soda and the most important part: raw sugar. Seriously can I tell you how wonderful these are?? If you are like me (or my sisters, who share my tastes for rock candy) you drink it with a straw and crunch the sugar between your teeth. I don't know about you but I think Mojito flavored rock candies would be a for sure hit! Now that I got myself all worked up, I may need to go make one right now :)

Tuesday: Black bean and Fajita beef tostadas; Homemade guacamole.

Wednesday: Homemade Shrimp Gyoza (they are usually called wontons or dumplings on the handy-dandy chinese take-out menu); steamed edamame; homemade sushi


Thursday: Alex is on his own as Mayce, Emma and I will be in Rochester for the night. I will mix him up some tuna so he has an option at home, however, he never complains about "having" to drive through Burger King for a delicious flame-broiled whopper :)

Friday: Since we will be heading back home from Rochester I will just be picking up a Pizza from Sam's Club. Ever had their pizza? Best. Take-out. Pizza. Ever. And a very large pizza for only $8. Score!

Saturday: Pot Roast with Carrots and Red Potatoes in the slow cooker; Homemade Red Lobster Cheesy Garlic Biscuits.

Sunday: Any leftovers from the pot roast or fish sticks and tots (a freezer staple)

Hm... what recipes to highlight...
Well the Gyoza with Soy-Citrus sauce are a new one to me so I don't have much for comments except I LOVE them when I order them at a restaurant. I found this recipe in my latest Cooking Light Magazine and I am just going to add some shrimp to the filling.

Oh and I couldn't possibly mention Red Lobster's Cheesy Garlic biscuits and get your mouth all watering and then leave you without the recipe!!
I found this one online in a crazy search to find the closest recipe out there and, trust me, this one nails it!

Red Lobster's Cheddar Bay Biscuits Makes about 8 large biscuits
2.5 cups baking mix
3/4 cups cold whole milk (you can use whatever kind you have)
4 Tbl. very cold butter, cut into small pieces
1/4 tsp garlic powder
1.5 cups shredded cheddar cheese (be generous)

Preheat oven to 400 degrees
Combine the baking mix with the butter using a pastry cutter (you can also use a fork). Mix until the butter is the size of small peas. Add the cheddar cheese, milk and garlic powder. Mix by hand until combined (be careful to over mix, you want to avoid warming up the butter with the heat from your hands or the biscuits won't be as tender). Using an ice cream scoop, drop biscuits onto parchment paper lined baking sheet.
Bake about 15 minutes until the tops are starting to brown (You will have to watch them closely at the end, my oven seems to cook them differently each time).
Melt 2 Tbl. butter and miss with 1/2 tsp garlic salt. Brush this mixture over biscuits and bake 1-2 more minutes.
Enjoy!

If there are any other recipes that you might want just post me a comment and I will get it to you as soon as I can :)

Have a great week... Enjoy what sunshine we are given... And try something new for dinner this week!

Check back for pictures!

Saturday, March 20, 2010

Bonus Recipe!

I just remembered one dish that would be completely unfair to keep all to myself... Ina Garten's Easy Sticky Buns! I made a half recipe of these sinful little treats for a brunch at my sister-in-law's house for my mother-in-laws birthday on Friday. They are everything you could want in a sweet, breakfast pastry-- flaky, gooey, sweet, crunchy, chewy... everything all at once. Five ingredients is all you need(I leave out the raisins) and what's even better is that you do not have to make the dough! I repeat: no proofing, no measuring, no mixing, no rising, no kneading... nothing. Ina was a genius when she thought to use frozen, store-bought puff pastry in this recipe. This recipe is definitely rich, which is why I halved it-- put twelve sticky buns in front of three, sweet loving women and you know they would be gone... six was definitely plenty :)

Enjoy!!!


oh and p.s. I will be trying to add photos in upcoming posts as well... I am just starting to get the hang of this :)

Menu: March 15th- March 21

Alright, here we go! First menu post...
I am going to have to play with the format of how to post these so, again, be patient with me :) I think this week I will try just listing the menu and highlighting some of my favorites with a description and a recipe. If you'd like the recipe for something that was not highlighted, just leave me a comment and I will add it! And since this menu is from last week, I can highlight a few of my favorite dishes and one very big disaster.

Monday:
Marinated Shrimp with Greek Panzanella Salad

Tuesday:
Pork Chops with Mango Salsa; Cauliflower and Broccoli Gratin; Bread and butter

Wednesday:
Korean, grilled chicken wings; Microwave Rice; Grilled asparagus

Thursday:
BLT's and tator tots

Friday:
BBQ with neighbors: Cheesy potatoes; grilled bbq chicken legs

Saturday:
Big breakfast! Sausage balls; sausage; eggs; orange rolls; orange julius.

Sunday:
Leftovers!!

OK, Let's start with the dishes. I have just three words for you: Greek. Panzanella. Salad. If you are a fan of summer, then you will be a fan of this dish. The recipe comes from Ina Garten, a chef on the Food Network. She combines cherry tomatoes, yellow and orange bell peppers, english cucumbers, thinly sliced red onion and crumbled feta cheese and tosses them all together with a really simple, homemade greek dressing. Then, to take it to the next level and make it even MORE mouth-watering, she adds homemade croutons!!! Genius! These toasted little pieces of heaven soak up all the flavors of the salad and leave you in a tiny, greek-induced coma.

*A few suggestions I have (little changes that I make) are to add the dressing to the salad right when you are going to eat it. In the recipe she says to combine all ingredients and let sit for thirty minutes. However, I have found that if you want to have any salad the next day, the dressing is better left off. And more importantly, the croutons MUST be added right before you eat it or you will end up with large chunks of soggy bread. This week, I actually made garlic toasts to eat with the salad instead of making the croutons and it was just as good if not better. (To make garlic toast: slice french bread and either drizzle with a little olive oil or spread with some butter. Then you can either sprinkle them with a little garlic salt and toast at 350 until golden or wait until they are toasted and then rub with a cut piece of whole garlic)

Sound delicious? Look up the recipe here:
http://www.foodnetwork.com/recipes/ina-garten/greek-panzanella-recipe/index.html

Next dish? Korean BBQ wings. If you like asian food, something a little spicier, and have been known to eat a chicken wing or two-- this is a great, much healthier option than those fried wings you'll find at just about any restaurant you visit. You marinate them overnight in a blend of soy sauce, garlic, brown sugar, spicy korean chile paste and green onions and then just simply grill them up! Simple and delicious.

And one last dish that cannot be ignored from this list: My mom's cheesy potatoes! Talk about cheesy, creamy, tangy goodness. These potatoes go with anything from eggs in the morning to just about any meat that comes off the grill. My favorite is teriyaki beef (a classic summer dish with a secret Hawaiian recipe from my childhood-- but that is a completely different blog post)

You'll want to mix these up the night before...
Mom's cheesy potatoes
Mix together:
One pint sour cream (I use reduced fat)
One can cream of mushroom soup
4 Tbl. melted butter.
One small onion, finely chopped (or one Tbl. onion powder)
3-4 cups shredded, sharp cheddar cheese (You can adjust this by your tastes but trust me, cheesier is better!)
1 Tbl. salt
One package frozen southern style hashbrown potatoes (I use Ore-Ida)
Pour evenly into 9x13 baking dish.
The next day, bake at 375 for one hour, or until bubbly and brown around the edges.

A tip from the wise? Go for the crunchy edge bits first!! :)

Ok... now for the not so fun part-- the disaster. We all have them, those recipes you are really excited to make. You've read all the reviews, looked at the pictures and can't wait to get cooking. Then you spend an hour preparing it, get it to the table, your husband takes one look, asks what it is, and then quickly and subtly passes it right on by. You on the other hand take a huge, heaping spoonful! This is the moment you've been waiting for! You take a big bite, chew, taste, pause... Oh. This is not so good. You finish your dinner, leaving the huge, heaping pile of food alone, and then throw the entire dish into the trash. Disappointed you walk straight to the recipe holder, grab the recipe and put it where it belongs-- right on top of the dish... in the trash.

This weeks disaster was something called a cauliflower and broccoli gratin. In theory it should have been good: cauliflower, broccoli, gruyere cheese, parmesan cheese, milk and bread crumbs. Maybe I just don't like cauliflower as much as I remember. Maybe my cauliflower was one day past its usable time frame. Maybe all the other reviewers were wrong? Who knows. All I know is that I won't be making it again. If you would like to try your luck, go for it. I wouldn't want to keep anyone from their beloved cauliflower :)

I hope you will try these wonderful dishes and tell me what you think! I will post next weeks menu as soon as I make it.

Thursday, March 18, 2010

Tips for making your weekly menu

Hey Guys! Thanks for visiting my blog! I am very new at this so be patient with me:)

I have wanted to start a blog for a long time, I thought it would be a great way for my family to see cute, new pictures of my daughter, Mayce, and it would give me a great outlet to actually use my journalism degree. But I never thought I'd have a whole lot to write about. My life looks like that of a typical stay-at-home mother of a one and a half year old--interesting to me, my husband, our families and maybe my friends. But that is probably about it.

A few days ago, however, a friend of mine had the idea that I start a blog about what I cook every week and I loved it! I. Love. Food. I love talking about food, watching t.v. shows about food, reading magazines about food, visiting websites about food, and, most importantly, EATING food. (I even like watching other people eat, weird, I know, but it is one of my most favorite parts of a cooking show.)

I have a method to planning my meals that I learned from my mother and have molded and evolved to what works for me. I would like to share it with anyone who is looking to stop asking the age old question: "What are we going to have for dinner?"

Here is what works for me:

1. I have a steno pad. The pages are divided in half vertically.

2. The first thing I do is write the days of the week down the left-hand side of the page. I space them by two or three lines depending on how many ingredients you usually need for each meal. I then look at my planner and write by the days of the week if anyone in my family has a plan in the evening that would effect what is made and served for dinner. (For example, in the summer my husband plays baseball and softball in the evenings during the week. For these nights, I try to plan something that can either be made ahead of time and brought to the games as a picnic or something that can be made quickly when we get home. Or else I know that we are going to eat out these nights and I don't buy groceries that are never used.)

3. I then look in my fridge and see if there is anything left over from the last week that either needs to be used up before it goes bad, or that can be used in recipes to reduce the amount of groceries I then need to buy. I look in my pantry and see what I have to work with.

4. I usually now ask my husband if anything sounds good for dinners for him in the upcoming week. Let's just say he is not much help (he eats anything and everything I cook--with the exception of squash, zucchini, and sweet potatoes) and I am left to come up with ideas on my own.

5. I now consult the many sticky notes that are usually littered around my computer desk. On these notes are recipes I've seen on tv that look like they are worth trying and then I just go with my cravings. I have so many new recipes I want to try, there will never be enough dinners to try them all. And some weeks I crave enough of my standard meals that I don't even get to work in a single new recipe. I then look at the ads (if I am making my menu on Sunday) and try to see what foods are on sale that week or what coupons I can use from my coupon folder.

6. Next, I go through day by day and write out the menu. List what the main is, any sides and vegetables and any desserts. Depending on how big your family is and how they eat you can work in leftover nights or even work the leftover ingredients from one dinner into another. I usually try to plan enough for dinner so that Alex can take it to work the next day for lunch which saves quite a bit of money instead of him eating out every day. Then on the right side of the steno pad, list all the ingredients that you don't have in your fridge or pantry that are needed for that night's meal. Then, depending on how you like to do your shopping, list all the other things you need to buy (i.e. cereal, milk, eggs, diapers, dog food, body wash, etc, etc). When it comes time for grocery shopping day, just rip the right side of the steno page off and you have everything you need on one master list (no more forgetting things and having to go back or walking around the store in a daze wondering what it was you went for in the first place!).

7. This is an extra step that is definitely not needed for some, but is necessary for most--I try to stay on my budget. While going through the week and listing the menu items that are sounding particularly delicious at the time, I try to keep in mind how much money each night is going to cost so I know what to plan for other nights in order to keep in my weekly budgeted amount for groceries. Every family is different, just go by your individual goals. I use the online ordering section of coborns.com and also samsclub.com to see how much each item on my list is going to cost. Then I add up the total and try not to impulse buy when I finally get to the grocery store!!

8. Finally, I try to create meals that are both healthy, yet exciting. Nobody wants to eat plain chicken or a tuna sandwich every night of their life. However, nobody can eat friend chicken or pizza every night of the week either (and if you can, don't tell anybody or you'll lose all your friends!) I try to plan meals that will keep my husband, who needs to eat quite a bit of food, satisfied yet allows me to portion control what I need to eat to stay healthy.

All of the meals on my menu are meals that are complicated enough to test my cooking ability, yet nowhere near expert level. Anybody who can read a recipe can make them. And they are all recipes that can be made while trying to entertain a one and half year old who has a very short attention span. Most of them can be eaten by children (depending on their pickiness level) and all of them can be adapted to fit your individual tastes.

Most of the time when my husband comes home, I am standing in a kitchen that looks like a war zone. There are dirty dishes in the sink, on the counter, on the floor (our puppy thinks she is a dishwasher- don't worry everything she touches is sanitized in the REAL dishwasher). Used ingredients and ingredients waiting to be used litter the counter tops. Cooking, to me, is not as glamorous as they make it seem on the t.v. shows. Sometimes you burn something. Sometimes you cut your finger. Sometimes you have to read a recipe three times before you start--and then continuously throughout the actual cooking process(and then you still forget a step). Sometimes parts of dinner are cold by the time you actually get around to getting everything on the table. And sometimes, despite your best efforts, dinner just ends up being thrown in the trash.

Hopefully this blog inspires you (whoever ends up reading it!) to try something new for dinner! Hopefully it gives you some ideas of meals to make for yourself or your family during those times when your mind is a recipe vacuum and you couldn't make a menu if your life depended on it. Or, at the very least, hopefully this blog gives you some entertainment as I share which of my dinners ended up being completely delicious dishes and which of my dinners ended up being complete disasters.